1. Go to Window> Preferences> General> Capabilities, and in the dialog, choose Enable All, and Apply.
2. Go to Window> Preferences> Java >Compiler. Ensure that the JDK Compliance is 5.0.
3. Go to Window> Preferences> Java> Installed JREs and make sure Websphere v6.1 JRE is selected.
4. Go to Project, and check "Build Automatically".
Create Enterprise Application Project(EAR) and Enterprise Java Bean Project (EJB)
1. Switch to the J2EE perspective and create a new Enterprise Application Project using File >New>Other.
2. In the New dialog box, find the J2EE section, then select Enterprise Application Project, click Next.

3. Name your project "HeadFirstEJB-ear". Click the Finish button. Note: You may see an error on the EAR project, this is OK; this is because there is no EJB project in the EAR yet.
4. Now create the EJB project. File> New> Other.
5. Find the EJB section, select EJB Project, and click Next.
6. Name the project "HeadFirstEJB-ejb", make sure the "Add project to an EAR" checkbox is selected and the EAR Project is HeadFirstEJB-ear. Press Next.

7.
Skip the Project Facets
screen by clicking the Next
button.
8. On the EJB module screen, make sure to uncheck the "Create an EJB Client
Jar module to hold the client interfaces and classes" checkbox, then click
Finish.

Note:
You may see an
error on the EJB project; this
is ok, as there
are no beans
in the project yet.
Go to
the Project Explorer window and
expand both the EAR and
EJB projects.
Create Session Bean:
In RSA, select the Project Explorer and
expand the EJB project, then expand the Deployment Descriptor section. It
should look similar to this:

we are creating a Session bean called
"Advice".
1. Right-click on the Session Beans entry, and select New>
Session Bean
2. In the Create an Enterprise Bean dialog, name the bean Advice,
and ensure that the package name is ejbs. Note: Do NOT NAME IT "ADVICE BEAN'', then press Next.

3. On the next
screen, you shouldn't have to change anything, but should note that the wizard
is going to create the three files (one class and two interfaces)

4. Press Next twice (skipping the EJB Java Class Details screen). On the Select Class Diagram for Visualization screen, uncheck the "Add bean to Class Diagram" checkbox and then press Finish. There will now be no errors on the projects.
5. Now if you expand the Advice bean section in the project explorer, you should be able to see the three files that have been created for you by the wizard. See the following:

Bean Class:
If you double-click the AdviceBean class in the project ,explorer, it will open up the bean class.
Note that the wizard has already created the
boilerplate code for the Session Bean interface as well as the creation method:
ejbCreate(), ejbActivate(), ejbPassivate(), ejbRemove() and
setSessionContext( SessionContext ). The
wizard also created a seriaiVersionUID that is recommended for any class that
is serializable. The Session Bean interface extends Serializable. There is also
a mySessionCtx variable to hold the session context that is set by the server.
The server will call setSessionContext() during the beans lifecycle.
Type in the getAdvice() method in thw AdviceBean.java file. Take a look at the Advice.java interface file. You will need to add the getAdvice() method signature to it. There's another way to have RSA add your method signatures to the interfaces, but for now, do it by hand.
In the AdviceHome.java interface, the wizard has taken
care of the create() method for
you.
Viewing the Deployment Descriptor:Select and expand the EJB project. In the
J2EE Perspective, you can open the Deployment Descriptor by double-clicking on
the entry (Deployment Descriptor) just below the HeadFirstEJB-ejb. Or you can open
the ejbModule folder, expand the META-INF folder, and then double-click on
the ejb-jar.xml file. This will open the Deployment
Descriptor editor.


At this point you can view the Deployment
Descriptor to see what RSA has created. It is worth noting that when using the
J2EE perspective, RSA displays in slightly different fashion than when in the
Java perspective. After opening the project, switch back and forth, and observe
the differences.
There are tabs along the bottom of the editor which present a user friendly view of the Descriptor.
(Do
not be concerned with
understanding everything that is being presented.) By default, the source tab is
not open
for view. Find the Source tab,
and click on it. You should
see the following.

Deploying
the Application:
At this point, you have an application that
can actually be deployed to the server. Before you can deploy the application
however, you need to generate the deployment code. This process generates the
code needed to facilitate the remote EJB call from the client.
1. In the Package Explorer, select the EJB project, right-click on it. In the selection list about 3/4 down choose Prepare For Deployment. Note: There will be no successful completion message; if you do not see an error, the process was successful. Examine the new contents of the ejbModule folder to see the new artifacts & packages that RSA created. The generated code will be distinctive and will have names prefaced with an underscore and/or EJS. See the following:


2. If
there is no server view pane open, open it now (Window> Show View>
Servers). When creating a new workspace, RSA should have created a server(s) by
default. If there are no servers present in the view, right-click in the server
pane and create a new server- you can use the
default RSA profile. Now start the server and ensure that it starts correctly
by viewing the console output- you should see no errors.
3. You
are now ready to deploy the application. In the server pane, select the server. Right-click and choose Add and Remove Projects from
the list. This will bring up the following dialog:

4.The EAR project will appear in the Available Projects section. Click the Add button to move the project to the Configured projects, and click Finish.
5. You will see activity in the console. Check the console for successful installation. Among other information, you should see a line of text containing the following: Application started:
HeadFirstEJB-ear. Right-click on the server and select Stop.
5. You will see activity in the console. Check the console for successful installation. Among other information, you should see a line of text containing the following: Application started:
HeadFirstEJB-ear. Right-click on the server and select Stop.
RSA- Universal Test Client
We will now examine a built in facility in RSA to test EJBs.
Excerpt from IBM Help Center:
Universal Test Client:
The server tools provide you with a Web-based Universal Test Client where you can test your enterprise beans and other Java objects running in a local or remote server. Using this test client, you can test the local or remote interface methods of your enterprise beans. By calling the methods and passing user-defined arguments you can test the methods to ensure that they work correctly.
Using the Universal Test Client, you can accomplish the following tasks:
• Find an enterprise bean when you know or do not know the JNDI name
• Call a method
• Remove an enterprise bean
• View public fields of methods
• View fields
• View methods
• Filter the methods displayed in the Universal Test Client
Following, are some basic steps to use the Universal Test Client:
1. If your server is not still running from the previous exercise, please start it now.
2. Right-click on the 6.1 server in the server view, and select Run Universal Test Client (third
option from the bottom of list). The test client page should appear.
3. In the upper left of the pane, click on JNDI Explorer. This will display information in the right pane.

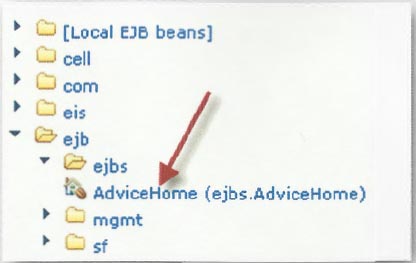
4. Now in the right-hand pane and expand the ejb folder. Expand the ejbs folder and click on the AdviceHome entry.

5. Now look in the upper left corner of the pane. Expand the AdviceHome entry and click Advice Create()
• Call a method
• Remove an enterprise bean
• View public fields of methods
• View fields
• View methods
• Filter the methods displayed in the Universal Test Client
Following, are some basic steps to use the Universal Test Client:
1. If your server is not still running from the previous exercise, please start it now.
2. Right-click on the 6.1 server in the server view, and select Run Universal Test Client (third
option from the bottom of list). The test client page should appear.
3. In the upper left of the pane, click on JNDI Explorer. This will display information in the right pane.

4. Now in the right-hand pane and expand the ejb folder. Expand the ejbs folder and click on the AdviceHome entry.
5. Now look in the upper left corner of the pane. Expand the AdviceHome entry and click Advice Create()

6. In the right-hand pane click on the Invoke button. This calls the create() on Home interface.

7. Now another button appears just below the Invoke button. Click the Work with Object button.

8. You will see another entry appear in upper left called Advice 1. Click on this entry to expand it.
9. The methods available in the Advice bean- getAdvice() is displayed.
7. Now another button appears just below the Invoke button. Click the Work with Object button.

8. You will see another entry appear in upper left called Advice 1. Click on this entry to expand it.
9. The methods available in the Advice bean- getAdvice() is displayed.
10. Click on the getAdvice() method. An Invoke button will now appear in the right-hand pane.

11. Click the Invoke button in the right pane and the output from getAdvice() will be displayed!
11. Click the Invoke button in the right pane and the output from getAdvice() will be displayed!